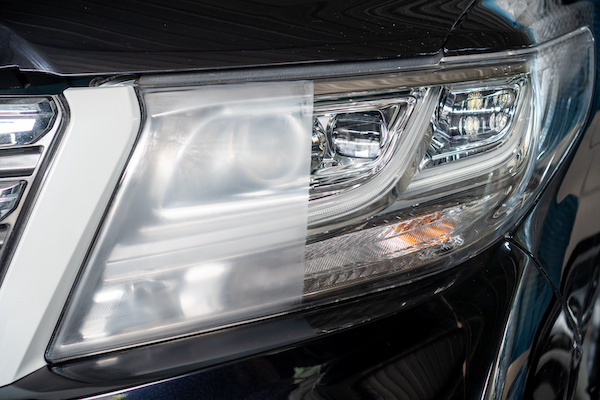
After some time, a car wash won’t do a good enough job of getting the dirt and grime off your headlights. If you notice that your headlights are foggy or yellow, it means that they are oxidized (or at least the lens is). At Prestige Autohaus, we understand how important visibility is when it comes to driving. If your vehicle’s headlights have been worn down, you need to restore them.
Professional headlight restorations can add up over time. If your vehicle isn’t impacted severely, you can definitely get away with a DIY headlight restoration job. Today, we will share these 3 easy methods for at-home headlight restoration. You’ll be blown away by what you can do with these household items.
Method 1: Toothpaste
Yep – you read that right! Start out by washing your car as you normally would. Once you dry it, apply a generous layer of toothpaste onto the headlight lens. Let it sit and then wipe it away with a dry microfiber cloth. Do so in a scrubbing motion. Then, rinse with water.
Method 2: Baking Soda
Start by creating a paste with a 1:1 ratio of water and baking soda. Then, apply the mix to the headlight lens. Use circular scrubbing motions to massage the product. Rinse with water.
Method 3: Vinegar
You’re going to need to know how to remove the lens for this method safely. Once you successfully, remove the yellowed lens, soak them in a tub or bucket of vinegar for at least 30 minutes to an hour. It won’t smell pleasant once you take it out. Thoroughly rinse it with clean water and go in with car soap to get rid of the vinegar smell.
Say goodbye to your weathered or fuzzy headlights because these DIY tips will get the job done. Sometimes, this is all it takes to brighten up your path when driving at night. If these don’t work for you, then your dim headlights may suggest other problems, such as burnt-out bulb or other electrical car problems.
If you suspect you need electrical auto repairs, please give the team at Prestige Autohaus a call or visit soon.